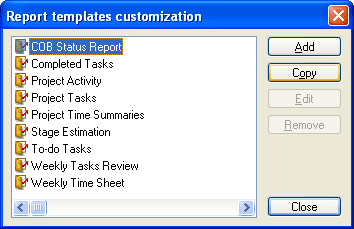
While DevPlanner provides a good set of tested reports, some circumstances still require defining new reports or customization of an existent. To include new report type to DevPlanner reports list or to customize an existent report provided Customize reports dialog. Click menu Tools->Templates->Customize reports.
Usually there is no need to create new report from the scratch. Customization of an existent report in most cases is enough. Simply select similar report and make a copy using Copy button. Rename it as you want by clicking list item once and editing, like usual file renaming in Explorer. Click Edit button to start editing in your favorite XSL editor.
 Specify XSL editor for reports using Options dialog.
If you still need an undefined report you can do so using steps below. Also these steps will help understanding report template structure.
1) Create new empty text document.
2) Define XSL header and footer as in the example.
<?xml version='1.0'?>
<xsl:stylesheet xmlns:xsl="http://www.w3.org/1999/XSL/Transform" version="1.0">
  <xsl:output method="html"/>
  <xsl:param name="AffectedCategory"/>
  <xsl:param name="ReportingPeriodStart"/>
  <xsl:param name="ReportingPeriodEnd"/>
  <xsl:template match="/">
  <HTML>
  <HEAD>
  <TITLE>Report: Report title</TITLE>
  <META NAME="Report" CONTENT="Report title in reporting dialog"/>
  </HEAD>
  <BODY>
  <H1>Report title</H1>
  <!-XSL transformation here -->
  </BODY>
  </HTML>
  </xsl:template>
</xsl:stylesheet>
3) To handle user defined report parameters, like affected category or reporting period provided parameters in XSL: AffectedCategory, ReportingPeriodStart, ReportingPeriodEnd. AffectedCategory parameter is ID attribute of CATEGORY tag in the plan document. ReportingPeriodStart and ReportingPeriodEnd are both Variant of subtype Date.
4) Provide XSL transformation statements after the report title. See XSL reference
in MS XML 4.0 SDK for details.
Example:
  <TABLE BORDER="0" CELLPADDING="2"
  CELLSPACING="1">
  <TR>
  <TD BGCOLOR="#CCCCCC">Name</TD>
  <TD BGCOLOR="#CCCCCC">Deadline</TD>
  <TD BGCOLOR="#CCCCCC">Description</TD>
  </TR>
  <xsl:for-each select="//TASK[@STATUS='0' or @STATUS='1']">
  <TR>
  <TD BGCOLOR="white"><xsl:value-of select="@NAME"/></TD>
  <TD BGCOLOR="white"><xsl:value-of select="@DEADLINE"/></TD>
  <TD BGCOLOR="white"><xsl:value-of select="DESCRIPTION"/></TD>
  </TR>
  </xsl:for-each>
  </TABLE>
For predefined DevPlanner tags see details in DevPlanner format specification.
5) To provide report personalization support, including author and company name, insert the following fragment to the XSL:
  <P align="right">
  <xsl:for-each select="//PROPERTIES">
  <xsl:value-of select="@AUTHOR"/><BR/>
  <xsl:value-of select="@COMPANY"/><BR/>
  <xsl:value-of select="DESCRIPTION"/>
  </xsl:for-each>
  </P>
6) Save the file to any folder. Specify .xsl extension for the report template file.
7) Invoke customize reports dialog (menu Tools->Templates->Customize reports). Click Add button and browse for your report file.
8) Test this report using an existent DevPlanner document.
See also
Defining new document templates | DevPlanner format specification